How to Record Voiceover at Home: A Beginner's Method
How to record voiceover at home: the room, mic position, gain, settings and light cleanup that make narration sound clean on a beginner budget.
Learning how to record voiceover at home is the first real skill my beginner YouTube channel needs, because most of my videos will be voice-led: screen recordings, desk shots and product b-roll with my narration over the top. This guide is the method I've pieced together from manufacturer documentation, software manuals and independent reviews, written for someone starting from nothing.
It is a research guide, not a report of my own recordings: where a claim comes from a source, I link it. Links to Amazon UK are affiliate links, so if you buy through one, Creator Kit Lab earns a small commission at no extra cost to you.
What do you need to record voiceover at home?
Less than most kit lists suggest. A voiceover is one voice in one room, so the chain is short:
| Item | What it does | Do you need it on day one? |
|---|---|---|
| Microphone | Turns your voice into a signal the computer can record | Yes |
| Closed-back headphones | Let you hear your voice and the room while you record, without the sound leaking back into the mic | Strongly recommended |
| Recording software | Captures the audio as a file you can edit | Yes, and free options are fine |
| Stand, boom arm or mount | Holds the mic at a fixed distance from your mouth | Yes: a mic in your hand or flat on the desk is hard to keep consistent |
| Pop filter or foam windscreen | Softens the bursts of air from "p" and "b" sounds | Useful, and cheap |
| Audio interface | Converts an XLR mic's signal to digital for the computer | No, not with a USB mic |
A USB mic has the converter built in and plugs straight into a computer. An XLR mic uses the three-pin connector professional mics use and needs an audio interface (a small box that turns the mic's signal into digital audio). A USB/XLR hybrid gives you both: start on USB today, move to an interface later without replacing the mic. That is the upgrade path, and it is why I only shortlisted hybrids plus one budget condenser.
Which room in your home should you record in?
The room matters more than the mic. In an untreated room the microphone hears your voice twice: once directly, and again a fraction of a second later after it bounces off bare walls, the ceiling and the desk. Those reflections are what make home narration sound boxy or hollow.
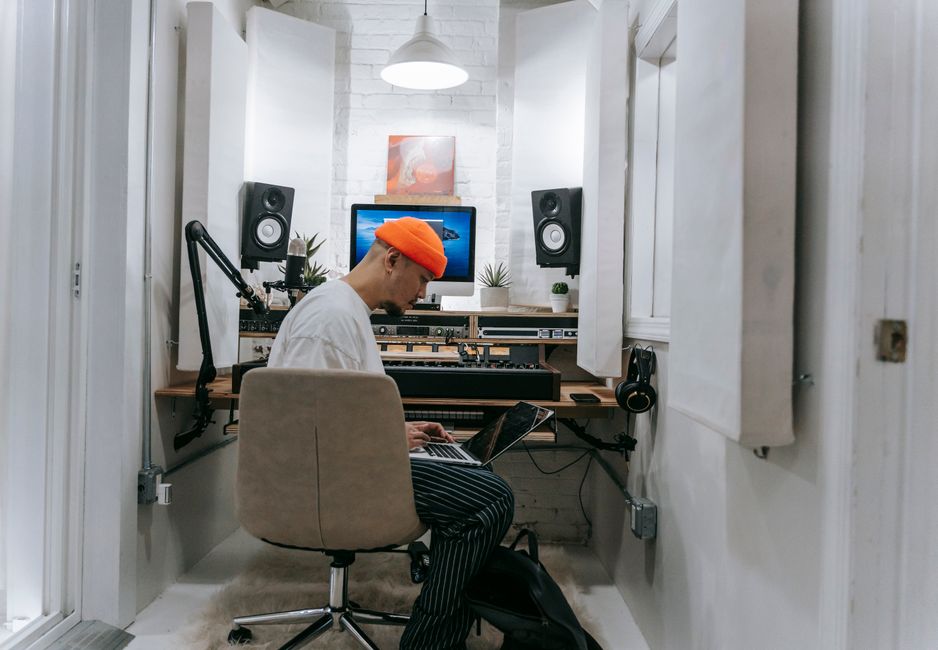
Pick the room with the most soft surfaces. A bedroom with carpet, curtains, a bed and a full wardrobe will almost always beat a kitchen, a hallway or a sparsely furnished office with a hard floor. Within that room, face into the softest part of it, such as an open wardrobe or a curtained window, rather than a bare wall.
Then remove the noise you control. Switch off desk fans and air purifiers, close the window, move your phone out of reach and pick a time of day when the street is quiet. A constant hum is fixable afterwards; a door slam or a passing motorbike is not.
If the echo still bothers you, that is a job for acoustic treatment, not soundproofing. My guide to soundproofing vs acoustic treatment explains the difference, and the acoustic panels guide covers what is worth hanging on a wall.
Should you use a dynamic or a condenser mic?
For most home rooms, a dynamic. A dynamic mic (a moving-coil design, less sensitive and worked close to the mouth) lets your voice dominate the recording so the room falls away. A condenser mic (a lighter, more sensitive capsule) captures more detail, and with it more of the room's echo and background hum. The Podcast Host, a long-running podcasting education site, lists a well-treated room as a condenser requirement and calls a dynamic a good fit for the non-professional rooms most people record in.
My explainer on what a dynamic microphone is goes deeper, and polar patterns explained covers why "cardioid" on the box reduces sound from behind the mic without stopping reflections arriving from the front.
For my own channel I chose the MAONO PD200X (a dynamic USB-C and XLR hybrid from Chinese audio brand MAONO). It will fit well onto the stand I bought, and I'd rather have my mic raised than sitting on the desk. That reason belongs to my setup, so if you are starting from scratch the PD200XS kit bundles the same mic with a boom arm, and the FIFINE AmpliGame AM8 ships with a desk stand. If your budget is tighter still, the Amazon Basics Mini USB Condenser is the cheapest way in, provided your room is quiet. The full shortlist, with each mic's sourced pros and cons, is in my budget microphone for voiceover comparison.
Where should the microphone go?
Close, consistent and slightly to one side.
- Distance. Budget dynamics are built to be worked close. Microphone Geeks, an independent microphone review site, recommends about 5-8 cm from your mouth for the PD200X. Further away, your voice gets quieter relative to the room, and you end up turning the gain up and recording more echo.
- Angle. Aim the mic at your mouth from just off to the side or slightly below, rather than straight on. The bursts of air from "p" and "b" sounds then travel past the capsule instead of into it.
- Consistency. Mark your position. If you lean back between takes, the level and tone change, and the edit will show it.
Boom arm, desk stand or multi-arm stand? A desk stand is simple but puts the mic low, so you hunch towards it and every keyboard tap or knock on the desk travels up into the capsule. A boom arm (a sprung, clamp-on arm) holds the mic in the air in front of your mouth and swings out of the way when you are done. A floor or multi-arm stand does the same job off the desk entirely. Raising the mic is the point: it keeps a fixed distance to your mouth, lets you sit upright, and moves it away from desk vibration.
Two small accessories help. A shock mount (a cradle of elastic or rubber that suspends the mic) stops vibration from the stand reaching it. A pop filter (a mesh screen) or a foam windscreen over the grille softens plosives.
How do you set your recording level?
Gain is how much the mic's signal is amplified before it is recorded. It is not the same as volume: volume only changes what you hear, while gain changes what goes into the file. Too little gain and your voice sits close to the noise floor. Too much and the loudest words clip, which flattens the waveform into a distortion no software can undo.
Digital levels are measured in dBFS (decibels relative to full scale, where 0 is the loudest value a file can hold). For speech, aim for your loudest words to peak around -12 dBFS, with the average nearer -18 dBFS. My gain staging guide explains why that headroom matters.
To set it, read a few lines of your script at full performance volume, including the most emphatic line, and adjust until the peaks land in that zone. Do it at the volume you will actually narrate at: most people get louder once they relax into a take.
Quiet speakers should expect to run the gain high. Dynamic mics are less sensitive by design, so near-maximum gain is common rather than a fault; Microphone Geeks reports no audible hiss from the PD200X with USB gain at 80-100%.
Listen while you record. Zero-latency monitoring is a headphone socket on the mic that plays your voice back with no delay, so you hear plosives, rustles and room noise as they happen instead of discovering them in the edit. Use closed-back headphones so the sound does not leak back into the mic.
What settings should you record voiceover at?
- Sample rate: 48 kHz. It is the audio sample rate YouTube recommends for uploads, and it matches video projects, so nothing needs converting in the edit.
- Bit depth: 24-bit if your mic offers it. It leaves more room below the peaks, which makes a slightly-too-quiet take easier to rescue. Several budget USB mics record at 16-bit, which is fine when the level is set properly.
- Format: WAV. Record uncompressed and let your editor or YouTube compress at the end. An MP3 straight from the recorder throws detail away before you have edited anything.
- Channels: mono. One voice on one mic is a mono source. Recording stereo just doubles the file size with two identical channels.
Which software should you record with?
Free software is enough. The choice depends on whether you are recording narration on its own or narrating over your screen as you go.
- Narration on its own: Audacity (a free, open-source audio editor for Windows, macOS and Linux) records, edits and cleans voice, and it is the tool the cleanup steps below refer to. Mac owners also have GarageBand, Apple's free music and audio app.
- Narrating over a screen recording: OBS Studio (free, open-source recording and streaming software) captures the screen and your mic together. The OBS recording guide recommends recording to MKV, so a crash does not corrupt the whole file, then remuxing (converting the container without re-encoding) to MP4.
- Built into your computer: on a Mac, Shift-Command-5 opens screen recording controls where you can choose your microphone. On Windows, the Snipping Tool records a "video snip" of the screen.
Whichever you use, check the input device before every session. Operating systems and apps have a habit of falling back to a laptop's built-in mic, and a whole take on the wrong mic is a common, painful mistake.
Should you record the voiceover with the video or separately?
Separately, for anything scripted. Record the narration as its own audio track, then cut your screen footage and b-roll to it in the editor. You can redo a fluffed sentence without redoing the visuals, and you can keep your voice the same distance from the mic for the whole take.
Recording live over the screen suits unscripted walkthroughs, where talking as you click is the content. Even then, record into OBS or a similar tool that keeps the mic on its own audio track, so you can adjust it later.
How do you record a clean take, step by step?
Write and print the script
Write for speaking, not reading: short sentences, one idea each. Mark the words to stress. Read it from a tablet or paper held at mic height, not a screen below the desk.
Quiet the room
Fans and purifiers off, window shut, phone on silent and out of reach. Put on closed-back headphones.
Position the mic
About 5-8 cm from your mouth, slightly off to the side, with a pop filter or windscreen fitted.
Set the gain
Read your loudest line at full volume and adjust until the peaks land around -12 dBFS.
Record 10 seconds of silence
Sit still and say nothing. This room tone gives the noise reduction a profile and gives you filler for gaps in the edit.
Record in short sections
Read a paragraph at a time. If you fluff a line, pause, then repeat the whole sentence. The pause makes the mistake easy to find and cut.
Listen back before you pack up
Check a minute of the take on headphones for clipping, hum or the wrong input before you move the mic.
How do you clean up a voiceover after recording?
Lightly, and in this order.
- Edit first. Cut the fluffs, the repeated sentences and long breaths. Fill any gaps with the room tone you recorded, not digital silence, which sounds unnaturally dead.
- Noise reduction, if you need it. In Audacity you select a stretch of room tone, choose Get Noise Profile, then apply the effect to the whole take. The Audacity manual is clear that it removes constant sounds such as hum, hiss and fan noise, not clicks or traffic, and that reducing noise usually adds some distortion. Use the lowest setting that works: overdone, it leaves a watery, metallic sound that is worse than the hiss.
- EQ. An equaliser turns specific frequency ranges up or down. For voice, the usual moves are cutting the low rumble below your voice and gently taming any harsh or boxy range.
- Compression. A compressor narrows the gap between your quietest and loudest words, so the listener does not reach for the volume control. Gentle settings are enough for narration.
Some USB mics do part of this for you. The PD200X works with MAONO's free Maono Link software, which Microphone Geeks reports adds EQ, a limiter and a compressor. Note that these processing tools work only when the mic is connected by USB, not XLR.
Can you use an AI voice instead of your own?
You can, but it carries a monetisation risk your own voice does not. YouTube's channel monetisation policies class mass-produced, templated content as "inauthentic content", and name AI-generated content made with generic or unoriginal templates within it. The policy targets templated mass production rather than faceless channels as such: edited footage with your own storyline and commentary is a different thing.
On disclosure, YouTube's GenAI disclosure rules say cloning your own voice to create voiceovers or dubs does not need to be disclosed, but realistic content that makes a real person appear to say something they did not does.
My channel will use my own voice. For a faceless channel, the voice is the one thing that makes the videos recognisably yours, and it is the cheapest part of the setup.
What mistakes should you avoid?
Recording in the echoiest room
A bare home office with a hard floor sounds worse than a cluttered bedroom, whatever the mic.
Sitting too far from a dynamic mic
At arm's length the voice drops, the gain goes up, and the room comes with it.
Setting gain at a quiet volume
Test at your loudest line, or the emphatic moments will clip.
Recording on the wrong input
Check the input device in your software before every session.
Skipping headphones
Without monitoring, you find the hum or the rustle in the edit, not while you can still re-record.
Overdoing noise reduction
Heavy settings leave a metallic, underwater sound. Fix the room first.
Frequently asked questions
Can I record voiceover at home with my phone?
Do I need an audio interface to record voiceover?
What is the best sample rate for YouTube voiceover?
Why does my voiceover sound echoey?
How loud should my voiceover be when recording?
Is a condenser mic bad for voiceover at home?
Sources
- YouTube: recommended upload encoding settings
- YouTube: channel monetisation policies
- YouTube: disclosing altered or synthetic content
- Audacity manual: Noise Reduction
- OBS Project: standard recording output guide
- Apple Support: how to record the screen on your Mac
- Microsoft Support: use Snipping Tool
- The Podcast Host: the best podcast microphones
- Microphone Geeks: MAONO PD200X review
Budget microphone for voiceover: the one I chose
Gain staging and recording levels
Soundproofing vs acoustic treatment