YouTube Desk Setup: Lights, Mounts and Layout
How to turn one desk into a small studio you can record at in a minute
A YouTube desk setup is a desk arranged so you can sit down and record without building anything first: the light is already aimed, the mic is already on its arm, and the camera is already framed. This guide sets out how I would lay one out, which lights and mounts suit a desk, and what the kit costs at UK prices.
My own channel is mostly voice-led: screen recordings, plus shots of my hands and products on the desk, with some videos of me on camera. For that desk I chose a pair of softboxes and bought a clamp-on overhead stand, and I say which below. This is a research guide, not a test report: what each product does comes from its maker's page and its Amazon UK listing, linked as I go. Links to Amazon UK are affiliate links: if you buy through one, Creator Kit Lab earns a small commission at no extra cost to you. Prices are from Amazon UK when I checked on 3 November 2026, and they move daily, so check the current price before you buy.
What does a YouTube desk setup need?
Four jobs, and only one of them is the camera.
- Light: one large, soft source in front of you, so the camera is not straining in a dim room and your face is evenly lit.
- Sound: a mic close to your mouth, so your voice is loud and the room is quiet.
- Support: a stand that holds the camera, phone, mic or light where you want it, without taking desk space.
- Camera: a phone is enough to start. The desk layout matters more than the sensor.
The order of spending is the one from my YouTube starter kit guide: sound first, then light, then support, and a camera last. A desk setup adds one thing to that list. Everything has a fixed home, which is what lets a weekly upload schedule survive a busy week.
Which terms do you need to know?
- Key light: the main light on your face. Elgato also uses the term as a product name (Key Light, Key Light Air).
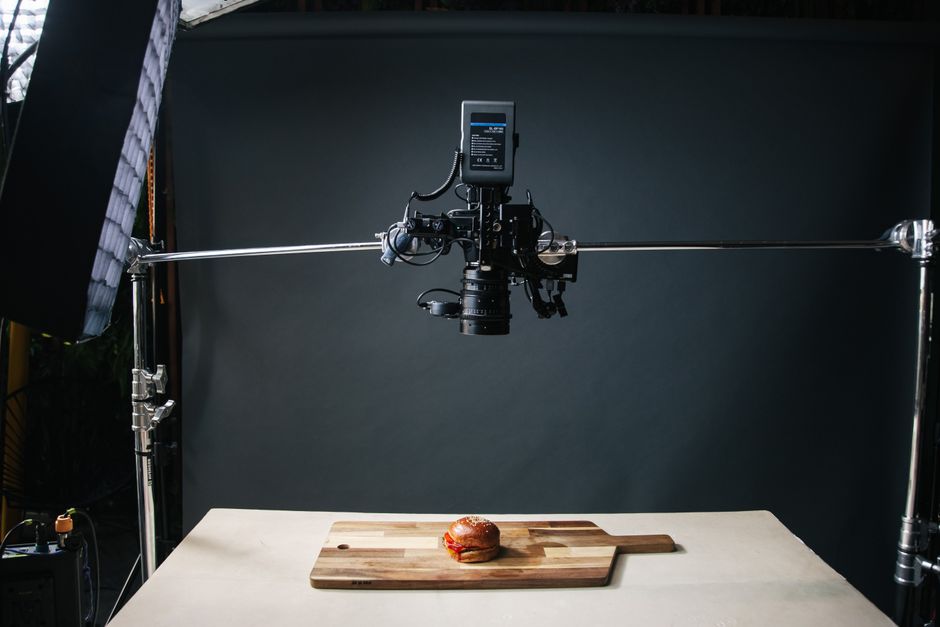
- Overhead or top-down rig: a desk-clamped column and arm that holds a camera above the desk, for unboxings and hands-on tutorials.
- C clamp: the screw clamp a stand grips the desk edge with. Its opening range sets how thick a desk it fits.
- 1/4-inch thread: the standard screw mount shared by cameras, phone holders, lights and arms.
- Colour temperature: how warm or cool a light is, in kelvin (K). My colour temperature and CRI guide explains why mixing warm and cool sources looks wrong on camera.
How should you lay out the desk?
Start from where you sit and work outwards. The camera goes in front of you, at or just above eye level for a talking shot. The key light goes to one side of the camera, angled back at your face. The mic sits just below or beside the frame, as close to your mouth as it can get without showing. Anything you show to camera on the desk sits in the space between your keyboard and the lens.
Two things decide whether that layout fits your desk.
- Depth. A shallow desk pushes the camera close to your face, which gives a wide-angle look and leaves no room in front of you for products. Clamping the camera to a stand at the back edge, or behind the monitor, buys back the distance.
- The edge. Every clamp-on stand needs a clear, solid desk edge. Check the clamp range against your desk's thickness before you buy, and look for a lip or crossbar under the top that would stop a clamp closing.
Put the computer screen you record from close to the camera's line, so your eyes are near the lens when you read. For a voice-led channel that matters less. For the on-camera videos, it is the difference between talking to the viewer and talking past them.
Where should the lights go?
Put the key light about 45 degrees to one side of the camera and a little above eye level, pointing down at your face. That angle gives your face shape without hard shadows, and it keeps the light out of the lens. A second light on the other side, set lower in brightness, fills in the shadow side. Turn it up for a flat, even look, or down for more contrast.
If you wear glasses, placement matters more than diffusion. Ulanzi's guide to desk lighting and glasses glare recommends starting each light about 45 degrees to the side and just above eye level, then checking one lens at a time on the camera preview. A softer light does not remove a reflection that comes from where the light sits, so move the light before you buy a bigger one.
Set every light in the room to the same colour temperature, and close the blinds if daylight falls on your face at a different one. A window behind you will also overpower any desk light, so turn the desk to face the window or block it.
Softboxes or a desk panel light: which suits a desk?
Both work. The choice comes down to floor space against desk space.
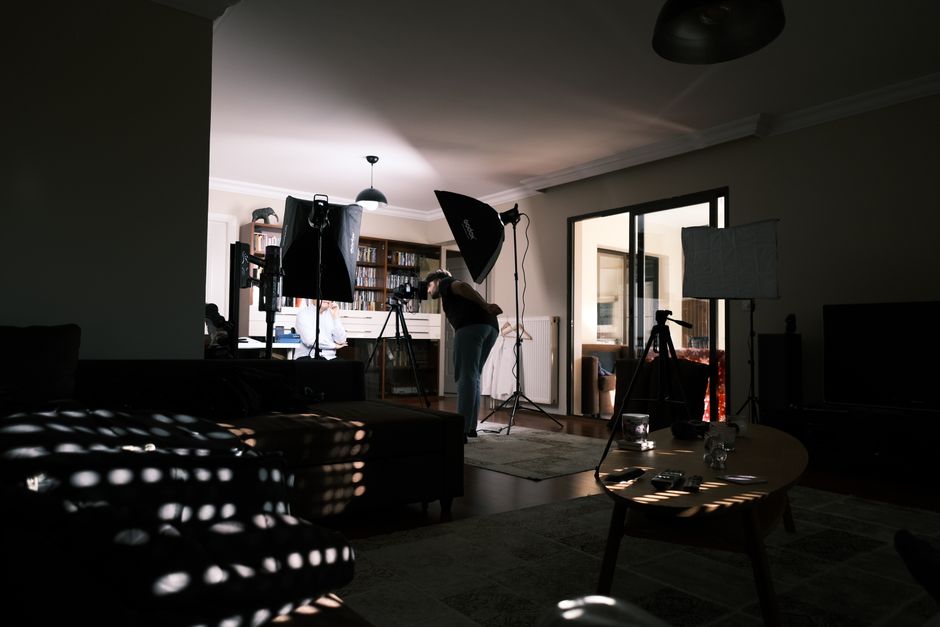
Softboxes stand on the floor. I went with the RALENO 2-pack 50x50cm softbox kit, as it is good value and well reviewed. The listing gives two 50x50cm softboxes, each with a 50W LED bulb, on stands that extend from 68 cm to 200 cm. It was rated 4.4 out of 5 from 784 Amazon UK ratings when I checked. A softbox is a lamp inside a fabric box with a diffuser on the front, which turns a bare bulb into a broad, soft light. The catch at a desk is the footprint: two stands either side of your chair take up the floor you would otherwise walk through.
A panel light clamps to the desk. The Elgato Key Light Air MK.2 (Elgato's 15-inch LED panel, from the creator-hardware brand owned by Corsair) is the obvious desk-mounted option. The listing gives up to 2,100 lumens, a CRI above 94 and a 2,900K-7,000K range, on a desk clamp that adjusts from 60 cm to 88 cm high. It was rated 4.2 out of 5 from 14 Amazon UK ratings, a small sample for a light released this year.
Check how you will power it. Corsair's announcement says the MK.2 is limited to 400 lumens when it runs from a single USB-C cable from a computer, so full output needs a USB-C PD (USB Power Delivery, the standard for higher-wattage charging over USB-C) adapter. Corsair also notes three 1/4-inch threads on the panel, so it can come off its own clamp and go onto an overhead rig.
For a voice-led desk, where the light mostly falls on hands and products, a pair of softboxes gives more light for the money. For a cramped room, or a desk you film at every day with your face in shot, a panel light that lives on the desk is the tidier choice.
How do you mount a camera over the desk?
With an overhead rig: a centre column clamped to the desk edge, and one or more arms reaching out over the desk. It is the shot for unboxings, writing, crafts and anything you do with your hands.
The number to read on any rig is the arm rating, not the column rating. Neewer's own listing for its DS002 overhead rig shows how far apart they sit: the centre column is rated to 10 kg, while the reaching arms carry 1.5 kg and 2 kg. The arm is what holds the camera out over the desk, so the arm sets which camera you can hang there.
I bought the NEEWER ST008 (a clamp-on aluminium desk stand from accessories maker Neewer, with a centre column and two arms). It cost only a little more than the budget Neewer tabletop stand I first picked. I chose it for its strength and its ability to hold several arms: I have a portable monitor it could hold, and the desk mic I am going with can attach to it too. It can also hold a heavier camera, which gives me more options with lenses. If I was just buying a mount to support a camera and nothing else, I would have gone with the cheaper Neewer.
Neewer's listing rates the ST008's centre column for 5 kg and each arm for 2.5 kg, never more than 5 kg in total at the joints. The column extends from 33.5 cm to 95.5 cm, and the desk clamp opens to 9 cm. It comes with eight cable ties and screw adapters for lights, mics and cameras. It was rated 4.6 out of 5 from 84 Amazon UK ratings when I checked.
For a phone only, you may not need a rig at all. My guide to filming overhead on a phone covers the cheaper ways to get the same angle.
Where does the microphone go on a desk?
Raised, and close to your mouth. A mic sitting on the desk picks up every keyboard tap and knock, and it sits too far away for a clear voice. An arm brings it to a hand's width from your mouth and keeps it just out of shot.
I'm going with the MAONO PD200X (a dynamic USB-C and XLR microphone from Chinese audio brand MAONO), because it will fit well onto the stand I bought, and I'd rather have my mic raised than sitting on the desk. It was rated 4.5 out of 5 from 3,781 Amazon UK ratings when I checked. A dynamic mic suits a desk in an ordinary room because it hears much less of the space around you; my guide to what a dynamic microphone is explains why.
Sharing one stand between the camera, a light and the mic saves desk space, but it shares vibration too. A tap on the desk travels up the column, so keep the mic arm short and type gently while you record. My best microphones for YouTube voiceover comparison covers more desk mics.
What camera angle works best at a desk?
Two angles cover almost every desk video.
- Front, at eye level: for talking to camera. Raise the camera to your eye line or a touch above. A camera looking up from the desk is the least flattering angle there is.
- Overhead: for hands, products and anything flat on the desk. Keep the camera level with the desk surface, so straight edges stay straight.
A third, a camera at 45 degrees looking down across the desk, works well as b-roll for a voice-led video. A two-arm stand can hold the overhead and the angled camera at the same time, which saves moving kit between shots.
A phone handles all three to begin with. My guide to starting a YouTube channel with just a phone covers the settings.
How do you keep cables and kit tidy?
Run every cable down the stand's column and along the back edge of the desk, tied every 20 cm or so. A loose cable in an overhead shot is the most common giveaway of a home setup, and one caught under a chair can pull a clamped rig over.
Plan the power sockets too. Two softboxes, a panel light adapter, a phone or camera charger and the computer can add up to more plugs than one wall socket holds. A surge-protected extension at the back of the desk keeps them in one place.
What does a YouTube desk setup cost?
| Job | Pick | Budget band |
|---|---|---|
| Light (floor) | RALENO 2-pack 50x50cm softbox kit | About £70 |
| Light (desk, alternative) | Elgato Key Light Air MK.2 | About £130 |
| Support and overhead | NEEWER ST008 | About £55 |
| Sound | MAONO PD200X | About £60 |
| My route: softboxes, ST008, PD200X | About £185 | |
Bands are rounded from Amazon UK prices on 3 November 2026, using the phone or camera you already own. Swapping the softboxes for the Key Light Air adds about £60, plus a USB-C PD adapter if you do not have one. For a desk built around a cinema camera and a broadcast mic, see my professional YouTube studio setup.
What would I set up first?
The light, before anything else on this page, because a dim desk is what makes phone footage look cheap. Then raise the mic off the desk. The overhead stand comes third, once you know you will film your hands or products often enough to want the shot ready every time.
Whatever you buy, set it up once and leave it. The best YouTube desk setup is the one that is already aimed and framed when you sit down, so the only thing left to do is press record.
Frequently asked questions
What do I need for a YouTube desk setup?
Where should a key light go on a desk?
Can a laptop power an Elgato Key Light Air MK.2?
How heavy a camera can an overhead desk rig hold?
How much does a YouTube desk setup cost?
Sources
- Corsair: Elgato's Key Light Air MK.2 hits the creator sweet spot
- Neewer UK: DS002 overhead camera rig desk mount
- Ulanzi: desk broadcast lighting and eyeglass glare
- Ulanzi: overhead camera mounting for desk-based content
- Amazon UK product listings for each product linked above, checked on 3 November 2026
YouTube starter kit UK
Filming overhead on a phone
Colour temperature and CRI
Professional YouTube studio setup